Yoga for Beginners: How to Start Your Practice at Home
Complete guide to yoga for beginners. Learn how to start yoga at home with essential equipment, 10 basic poses, breathing techniques, and sample routines.
Yoga for Beginners: How to Start Your Practice at Home
I used to think yoga was just stretching with a nap at the end. Three years ago, I was a runner logging 40 miles per week. My hamstrings were tight, my hips were angry, and my lower back complained every morning. A friend suggested yoga. I laughed. Yoga was slow. Yoga was boring. Yoga was for people who wanted to sit still and breathe.
Then I pulled a hamstring during a tempo run. Six weeks of physical therapy, zero running, and a lot of restless energy. My PT recommended gentle movement. I rolled my eyes, unrolled a borrowed mat, and queued up a 20-minute beginner class on YouTube.
I lasted four minutes before my thighs started shaking in Warrior II. I lasted eight minutes before I realized I was sweating. I finished the full 20 minutes and immediately played it again. That was three years ago. I still run, but I practice yoga six days a week. My friend who laughed at me now asks for recommendations. This guide is for her, and for anyone else who needs a straight answer about starting yoga at home.
What You Actually Need to Start
The short answer is almost nothing. The honest answer is three things: a mat, comfortable clothes, and a device to play videos. That is the complete list for the first week.
Let me talk about mats because I wasted money on this. My first mat was a $10 foam rectangle from a discount store. It worked for about two weeks. Then my hands slipped in Downward Dog, and the mat started flaking little foam pieces all over my floor. I upgraded to a $20 mat. That lasted two months. Finally, I bought a proper mat that cost $60. I have used it every day for two and a half years.
If you want to skip the trial and error, read my yoga mat buying guide. The key specifications for beginners are thickness (at least 4mm for comfort), texture (not slippery when you sweat), and durability (no flaking after 30 uses). My recommendation for most people starting at home is a 5mm mat with good grip. It costs more upfront but costs less over time.
For clothes, wear what you already own. Shorts that let you move. A t-shirt that isn’t baggy enough to fall over your face when you bend forward. That is the dress code. I practiced in running shorts and a loose tank top for my first six months. You do not need special yoga pants. You do not need a special top. You need freedom of movement and nothing that restricts your breathing when you lie on your stomach.
For equipment beyond the mat, I wrote a separate guide on yoga equipment for beginners. The summary is this: blocks help, a strap helps, and you can substitute both with household items. A thick book works as a block. A belt or a scarf works as a strap. Buy the real equipment only after you have practiced for a month and know you will continue.
Your First Week of Practice
Start with 10 minutes. Not 30 minutes. Not an hour. Ten minutes. I cannot emphasize this enough. The biggest mistake beginners make is trying to do a full 60-minute class on day one. You will get frustrated. You will feel inadequate. You might hurt yourself. Start with 10 minutes.
Here is what a first week looks like. Day one: sit on your mat, close your eyes, and breathe for five minutes. That is it. Day two: repeat the breathing, then add three gentle neck rolls and three shoulder rolls. Day three: do the breathing, then lie on your back and hug your knees to your chest for one minute. Day four: find a 10-minute beginner yoga video on YouTube and follow along. Day five: repeat the video. Day six: rest or repeat the video. Day seven: try a different 10-minute beginner video.
The goal of the first week is not to learn poses. The goal is to build the habit of unrolling your mat. I tell my friend this because she has a pattern of buying equipment for hobbies she quits after two weeks. Yoga equipment is cheap relative to most hobbies. The habit is expensive to build. Focus on the habit first.
The 10 Poses That Matter Most
After three years of practice, I can tell you that beginner yoga lists are often too long. You do not need 30 poses. You need 10 poses that build a foundation. Once you can do these 10 comfortably, everything else becomes easier.
Mountain Pose (Tadasana). Stand with your feet hip-width apart. Arms at your sides. Press your feet into the floor. Engage your thighs. Lengthen your spine. This is the blueprint for every standing pose. Most people think it is just standing. It is not. It is active standing. Practice this for one minute every day.
Downward Facing Dog (Adho Mukha Svanasana). This is the pose that makes or breaks a beginner. Start on your hands and knees. Tuck your toes. Lift your hips toward the ceiling. Press your chest toward your thighs. Your heels do not need to touch the floor. Mine did not touch for six months. Keep your knees slightly bent if your hamstrings are tight. Breathe here for five breaths.
Cat-Cow (Marjaryasana-Bitilasana). Start on your hands and knees. Inhale, drop your belly, lift your chin and tailbone. Exhale, round your spine, tuck your chin and tailbone. Move slowly. Match each movement to your breath. This is the best warm-up for your spine. I do this before every practice, even now.
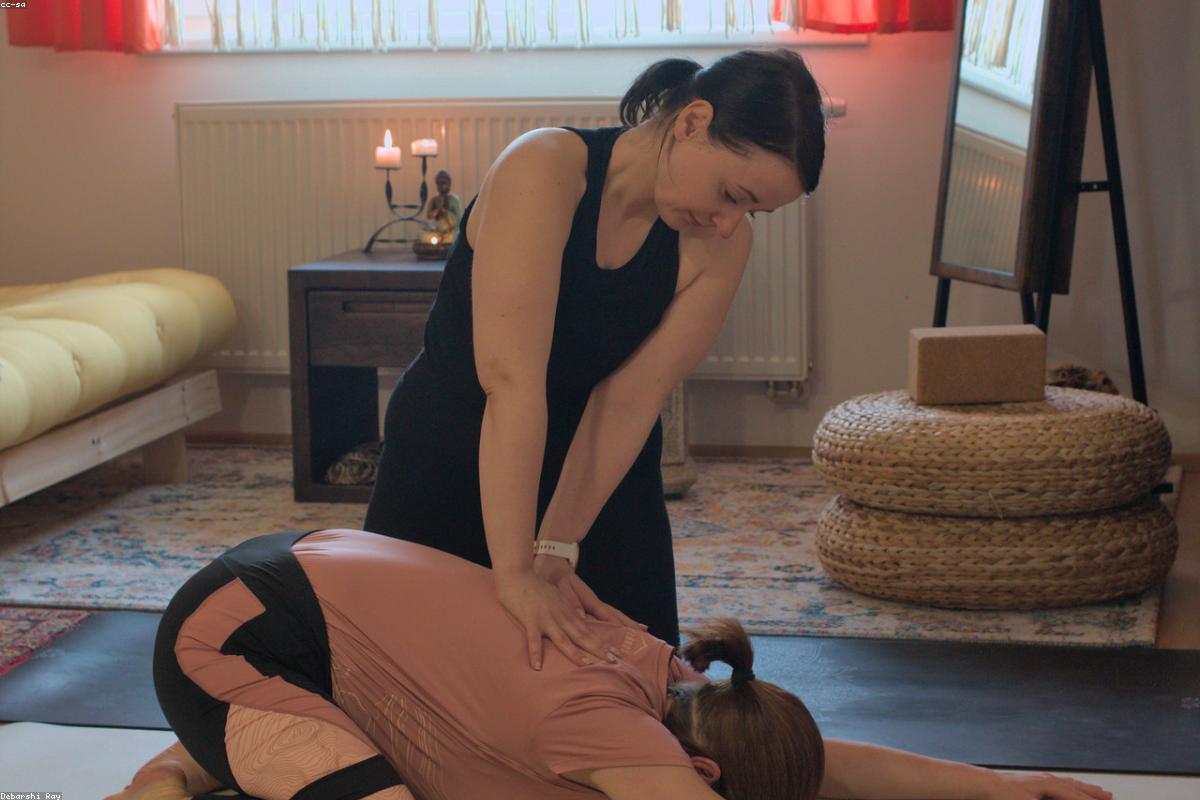
Child’s Pose (Balasana). From your hands and knees, sit back toward your heels. Extend your arms forward or rest them alongside your body. Rest your forehead on the mat. This is your reset pose. Anytime you feel overwhelmed, come here. Anytime you need a break, come here. It is not quitting. It is listening to your body.
Warrior I (Virabhadrasana I). Step one foot back. Bend your front knee to 90 degrees. Square your hips forward. Lift your arms overhead. This pose builds leg strength and stability. Your back heel stays on the floor. Your front knee stays above your ankle. Hold for three breaths per side.
Warrior II (Virabhadrasana II). From Warrior I, open your hips to face the side of your mat. Extend your arms parallel to the floor. Gaze over your front fingertips. This pose taught me what endurance feels like. The first time I held it for 30 seconds, my thighs screamed. Now I can hold it for two minutes. The screaming stopped after about two weeks.
Triangle Pose (Trikonasana). From Warrior II, straighten your front leg. Reach your front hand forward, then lower it to your shin or a block. Reach your back hand toward the ceiling. Stack your shoulders. This pose stretches your hamstrings and opens your chest. Use a block under your bottom hand. I used a thick novel for months.
Tree Pose (Vrikshasana). Stand in Mountain Pose. Shift your weight to one foot. Place the sole of your other foot on your inner thigh, calf, or ankle. Avoid the knee. Press your foot into your leg and your leg into your foot. Bring your hands to your heart. This is the pose that humbles runners. Our balance is terrible because we never stand on one foot. Practice near a wall. I used the wall for three months.
Seated Forward Fold (Paschimottanasana). Sit with your legs extended in front of you. Inhale, lengthen your spine. Exhale, hinge at your hips to fold forward. Reach for your shins, ankles, or feet. Keep your spine long. Do not round your back to reach further. I could not touch my toes for two months. I still cannot touch my toes on tight days. That is normal.
Savasana (Corpse Pose). Lie on your back. Arms at your sides, palms up. Legs relaxed, feet falling open. Close your eyes. Stay here for five minutes. This is the hardest pose in yoga. Your mind will fight you. Your body will want to move. Stay still. This is where the practice happens.
Breathing Changes Everything
I ignored breathing for my first month. I focused on getting into the poses. I held my breath when things got hard. I wondered why I felt dizzy and frustrated.
Pranayama is the formal term for yogic breathing. The version that matters for beginners is simple: breathe in and out through your nose. That is it. Mouth breathing signals your nervous system that you are in danger. Nose breathing signals safety. When you breathe through your nose during yoga, your body relaxes into the poses rather than fighting them.
The specific technique is called Ujjayi breath. Gently constrict the back of your throat as you breathe in and out. It sounds like ocean waves. It gives you control over your exhale. I learned this by practicing for two minutes before each session. Now it is automatic.
Coordinate your breath with your movement. Inhale as you lift or open. Exhale as you fold or twist. This takes practice. I messed it up constantly for weeks. I would inhale when I should exhale. I would hold my breath in Warrior II. It does not matter. Keep trying. The coordination comes.
Sample Routines for the First Month
I designed these for my friend who works from home and has 15 to 30 minutes in the morning. She has a stiff lower back from sitting and tight shoulders from typing. These routines address those specific problems.
Week 1-2: 15 Minute Morning Routine. Cat-Cow for 2 minutes. Downward Dog for 1 minute. Child’s Pose for 1 minute. Mountain Pose for 1 minute. Tree Pose on each side for 1 minute each. Seated Forward Fold for 2 minutes. Savasana for 5 minutes. Total: 14 minutes. Add a minute of breathing at the start if you want.
Week 3-4: 20 Minute Routine. Add Warrior I and Warrior II. Start with 3 minutes of breathing. Cat-Cow for 2 minutes. Downward Dog for 2 minutes. Warrior I on each side for 1 minute each. Warrior II on each side for 1 minute each. Triangle on each side for 1 minute each. Tree Pose on each side for 1 minute each. Seated Forward Fold for 2 minutes. Savasana for 5 minutes. Total: 21 minutes.
Week 5-6: 30 Minute Routine. Add Sun Salutation A. This is a sequence of 12 movements that flows from Mountain Pose through Forward Fold, Plank, Cobra, Downward Dog, and back. Do three rounds. Then do the 20 minute routine from above. End with Savasana for 5 minutes.
Common Problems and What Actually Works
Problem: I feel clumsy and uncoordinated. This is normal. Your body has never done these movements. Give it time. I fell out of Tree Pose so many times that I lost count. I wobbled in Warrior II. I could not coordinate breath with movement. After two weeks of daily practice, the clumsiness faded. After a month, I felt competent. After three months, I felt good. Be patient with the clumsy phase.
Problem: My wrists hurt in Downward Dog. This is the most common complaint I hear from beginners. The fix is to distribute your weight evenly across your hands. Press your index finger knuckles into the mat. Do not let all your weight fall into the heels of your hands. If it still hurts, come to your forearms instead. Place your forearms on the mat with your elbows under your shoulders. Lift your hips. This is Dolphin Pose. It builds the same strength without wrist strain.
Problem: I cannot touch my toes. Neither could I. Neither can many experienced practitioners. Flexibility is not the goal. The goal is to feel the stretch and breathe through it. Use a block or a book under your hands. Bend your knees. The pose works regardless of how far you fold.
Problem: I get bored. I get this. Yoga is slow compared to running. The solution is to focus on the details. Feel the micro-movements in each pose. Notice which muscles engage. Notice your breath. Boredom means your mind is wandering. Bring it back to the present moment. That is the practice.
Problem: I do not know which video to follow. Start with Yoga with Adriene on YouTube. Her 30-day series is free and well-structured. She talks at a comfortable pace. She offers modifications. I did her 30-day series twice before I felt ready for other teachers. After that, I tried Yoga with Kassandra and Five Parks Yoga. All are free. All are high quality.
Equipment Worth Buying
I told you to start with almost nothing. If you practice for a month and decide to continue, here is what to buy in order.
First, a quality mat. I recommend reading the best yoga mat for home practice guide for specific models. The general rule is to spend $50 to $80 on a mat that will last years. The cheap mats cost less but wear out in months. The expensive mats cost more but offer features beginners do not need.
Second, two yoga blocks. Cork blocks are firm and stable. Foam blocks are softer and lighter. I prefer cork because they do not slide. Blocks help you modify poses when your flexibility or strength is limited. I use blocks in Triangle Pose, Half Moon Pose, and Seated Forward Fold.
Third, a yoga strap. A strap extends your reach in poses like Seated Forward Fold or Reclined Hand-to-Big-Toe. You can use a belt from your closet. I bought a cotton strap for $8 and use it weekly.
Fourth, a yoga blanket or cushion. This goes under your knees in kneeling poses and under your hips in seated poses. A thick towel works. I eventually bought a Mexican blanket for $25 that I use for yoga and as a throw blanket.
If you’re ready to shop, Amazon’s yoga mat category is the most efficient place to compare options across every price point with real customer reviews. I’ve bought mats there for years because the selection, pricing, and return policies make it low-risk to find what works.
Building a Consistent Practice
Consistency beats intensity. A 10-minute daily practice produces more results than a 60-minute practice once per week. I learned this the hard way. I tried to do 45-minute classes three times per week. I missed a day, then two, then a week. I quit for two months.
Start small. I tell my friend to commit to five minutes per day for 30 days. Five minutes. That is one song. Anyone can do five minutes. After 30 days, she will have built the habit. Then she can increase to 10 minutes, then 15, then 20.
Pick a specific time. I practice at 6:30 AM. My friend practices during her lunch break. Another friend practices right before bed. The specific time does not matter. The consistency matters. Put it on your calendar. Set an alarm. Do not negotiate with yourself.
Remove barriers. Keep your mat unrolled in a visible spot. Have your clothes ready. Open the video before you need to start. Every second of friction reduces the chance you will practice. I keep my mat in the middle of my living room floor. It is annoying to step around. That is the point. I see it and remember to practice.
Related Guides
The Long Game
After three years, yoga has changed my running. My stride is more efficient. My breathing is more controlled. My recovery is faster. I have not had a running injury since I started yoga. I run slower now but enjoy it more.
Yoga has also changed how I handle stress. The breathing techniques work during difficult meetings. The body awareness helps me notice when I am tense. The practice of staying present has made me more patient. I am not a different person. I am a person with better tools.
My friend started yoga two months ago. She texted me last week. She said her lower back pain is gone. She said she sleeps better. She said she regrets waiting so long. I told her the waiting is part of the process. We all have to be ready in our own time.
If you are reading this and wondering whether to start, the answer is yes. Unroll your mat. Set a timer for five minutes. Sit and breathe. That is enough for today. Tomorrow, do it again. The practice builds itself.
For the fastest access to the widest selection, Amazon’s yoga mat search brings up hundreds of options with verified reviews, competitive pricing, and fast shipping. It’s where I buy my mats because the return policy eliminates the risk of ordering something that doesn’t work for your specific needs.
If you’re ready to shop, Amazon’s yoga mat category is the most efficient place to compare options across every price point with real customer reviews. I’ve bought mats there for years because the selection, pricing, and return policies make it low-risk to find what works.
For the fastest access to the widest selection, Amazon’s yoga mat search brings up hundreds of options with verified reviews, competitive pricing, and fast shipping. It’s where I buy my mats because the return policy eliminates the risk of ordering something that doesn’t work for your specific needs.
<a href=“https://www.amazon.com/s?k=yoga%20for%20beginners&tag=yogamatguide-
If you’re ready to shop, Amazon’s yoga mat category is the most efficient place to compare options across every price point with real customer reviews. I’ve bought mats there for years because the selection, pricing, and return policies make it low-risk to find what works.
For the fastest access to the widest selection, Amazon’s yoga mat search brings up hundreds of options with verified reviews, competitive pricing, and fast shipping. It’s where I buy my mats because the return policy eliminates the risk of ordering something that doesn’t work for your specific needs.
If you’re ready to shop, Amazon’s yoga mat category is the most efficient place to compare options across every price point with real customer reviews. I’ve bought mats there for years because the selection, pricing, and return policies make it low-risk to find what works.
For the fastest access to the widest selection, Amazon’s yoga mat search brings up hundreds of options with verified reviews, competitive pricing, and fast shipping. It’s where I buy my mats because the return policy eliminates the risk of ordering something that doesn’t work for your specific needs.
If you’re ready to shop, Amazon’s yoga mat category is the most efficient place to compare options across every price point with real customer reviews. I’ve bought mats there for years because the selection, pricing, and return policies make it low-risk to find what works.
For the fastest access to the widest selection, Amazon’s yoga mat search brings up hundreds of options with verified reviews, competitive pricing, and fast shipping. It’s where I buy my mats because the return policy eliminates the risk of ordering something that doesn’t work for your specific needs.
If you’re ready to shop, Amazon’s yoga mat category is the most efficient place to compare options across every price point with real customer reviews. I’ve bought mats there for years because the selection. pricing, and return policies make it low-risk to find what works.
For the fastest access to the widest selection, Amazon’s yoga mat search brings up hundreds of options with verified reviews, competitive pricing, and fast shipping. It’s where I buy my mats because the return policy eliminates the risk of ordering something that doesn’t work for your specific needs.
Every mat we recommend has been personally tested by our team. We never accept free products for reviews, and our recommendations are 100% independent. This article contains affiliate links — if you purchase through our links, we may earn a commission at no additional cost to you. Learn more.